
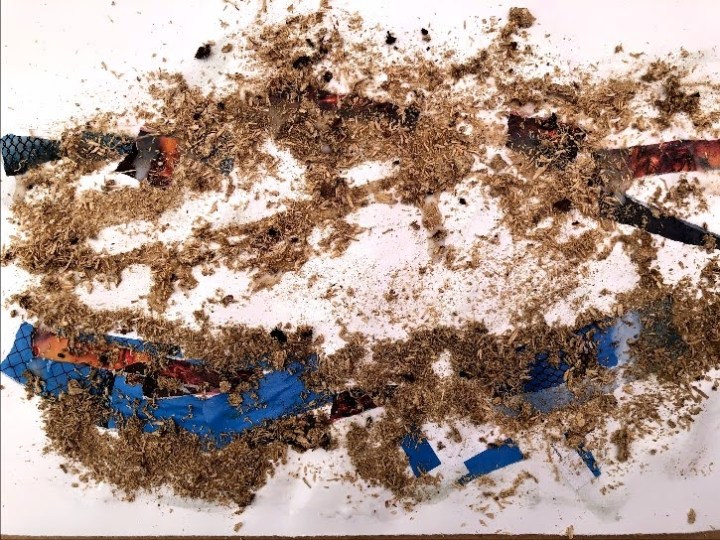
This task requires some additional materials such as paper, rags, bits and pieces to stick onto a support and to then paint over, using the texture in the structure of the painting. Of the several available scenarios, I’ve chosen ‘rough sea’ and recruited some pages of Aesthetica magazine and sawdust from a compressed log that got wet some while ago.
I drew out very roughly where I wanted my waves to be then applied PVA glue to parts where I thought a substrate of blue would be effective. After that, I looked at the lines of breaking waves and where foam might fly from these and glued the sawdust to those areas. This needed a spray with varnish (matte) to help keep it in place. It will take a while to dry so tomorrow is likely the earliest I can come back to it.
Last night I glued some feathers and ripped up paper towel roll to it and this morning sprayed it with Valspar’s canned ‘make paint stick’, primer, silver, pink, dark red, and grey which I had in my garage. This is partially to increase the likelihood of materials adhering to the surface and each other, but also to provide a base for acrylics. The sawdust is roughly arranged as foam might be and the dark red – which came out as a thin stream rather than a mist – follows some of those lines. I’m pleased to be doing this in the summer when I can have doors and windows open!

This next phase has involved running dilute wash through the textured areas, dabbing at more resistant patches with solid pigment, flicking a silver/white paint mix at the foam lines from a palette knife, and scrubbing unmixed paint into gaps with a toothbrush. The shape of it doesn’t really say ‘rough sea’ because it’s too evenly distributed, but I can see the potential for changing that. Waves are dynamic things, sitting on the margins of mathematical regularity and randomness so that there is a certain amount of expectation regarding their shape. They breach when the base is impeded by something solid like the beach, or when high winds take the tops off them. I see these as lashing towards a shore with steep upward draughts lying under the crests but I’m constrained a little by the half moon feathers sitting at the bottom like eyelashes. Ideally they would curve the other way.

I added a couple of lines of magazine paper twisted into shape to form the waves I wanted and give asymmetric balance. Then I added more thick paint + PVA and also matte gel for bulk. Again using a palette knife or a toothbrush. I find myself often making curling and twisting movements with any implement I’m using to apply paint. This is how the swirls and trails come about.
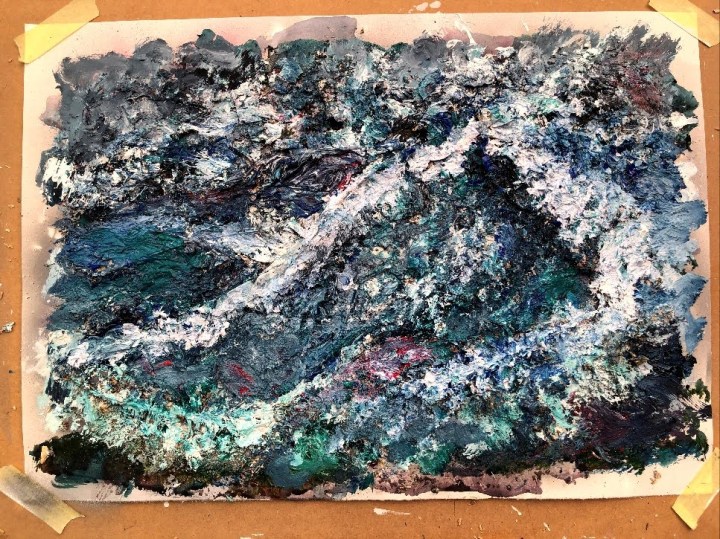
I should stop at this point as the media applied to the support outweigh it by some margin and I doubt it will take much more. Some of the material is unlikely, still, to stay put.
What did I learn from this? First, make a plan before you start or the textural material won’t be helpful. Second, this was much more fun than I had imagined it would be. And third, I may have fallen down a Maggi Hambling rabbit hole again! I’d like to think this is more mine than hers though; it’s not as if I have no relationship with the sea because, even though I grew up in Yorkshire, all our holidays were on the east or west coast and the sea struck me for its power as well as its aesthetics. Often brown at those resorts because it came in a long way and very shallow, churning up the sand as it progressed, but still sometimes wild and high nevertheless. In Brighton, the sea was different – high and close and very bright with little sand to fill its energy so able to reflect the sky much more closely. This wild sea is more Brighton than Blackpool.
Media: viridian green, primary cyan, Payne’s grey, process magenta, titanium white, metallic silver, PVA glue, Golden regular gel matte, Valspar spray paint as described.
Maggi Hambling – see Wall of Water on her website. http://www.maggihambling.com/work. Accessed 18 June 2020.
Time taken: approx 10 hours.

Reminds me a little bit of a video I watched where Frank Bowling was making a painting with pouring and sticking objects on the canvas. Check YT and https://www.tate.org.uk/art/artists/frank-bowling-792
LikeLiked by 1 person
Thanks – added to the forest of open browser tabs for lunchtime viewing 🙂
LikeLike