
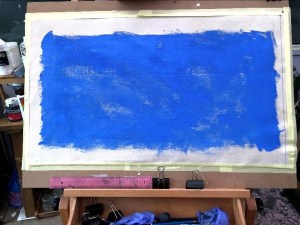
This task calls for a still life which can either be a new arrangement or based on an earlier sketch. The support is to be A3 minimum and can be treated paper, card, or canvas, and in the spirit of experimentation, I have chosen duck canvas recommended by my Drawing tutor and which I’ve never used before. The first steps have been to fix it somehow to my large board for preparation. Lacking a staple gun, I used masking tape then sprayed it with water and let it dry. Of course it buckled and pleated itself and so I retrieved my long-neglected iron and smoothed it out before taping it to the board again before applying a layer of transparent acrylic gesso. I have no real idea of how to paint on it so this will be a total experiment from beginning to end.
As the subject of the experiment, I’m thinking of working up my row of teapots from an earlier exercise; there’s a lot of blue around that but with other colours within the different items. I like the simplicity of the line up and the shapes they make as they’re almost in silhouette. I may remove the cafetiere; looking at the grouping, this seems out of place.
First pass. I’ve used a cadmium red wash which I hope will help pop out some of the later colours; and phthalo blue to make the rough shapes of the teapots, shelving, and verticals. These are essentially the ‘mood’ colours of the area itself upon which the actual colours of the teapots rest and with which they interact. More conscious now of complementary and broken colours, tones and hues, I may be in a better position to describe these items artistically.

I’m using phthalo blue, payne’s grey, and titanium white as the main palette, with some sap green to bring complementary contrast to some areas. I’ve discovered just how different this support is from anything I’ve used before; prepared as it is with gesso, it absorbs very quickly which means my usual strategy of finger-blending as I go is useless. So instead I’ve tried to make use of the roughness of any application by sticking with just one 3/4″ flat brush and I quite like how that is working out.
I’ve had a bit of a struggle with handles and spouts though, and these have needed fixing. I think the light patches (light behind the glass) needs to be toned down with a light wash, and the small teapot on the left needs to be less transparent, but tomorrow I’ll be able to see how it looks in better light. Speaking of which, some of the reflection on the pots themselves comes from a string of tiny lights hanging from various hooks along the shelf and draped over some of them. Representing those will be quite a challenge.

After looking at this on-screen a few times, what caught my eye was the yellow of the masking tape at the bottom of the painting and I wondered how much of what was happening above was influenced by this. So when someone else in the private OCA Facebook group mentioned that too I really couldn’t ignore it. That meant taking off the tape (and revealing the uneven edge where I’d ripped the fabric rather than cut it) to see what happened and it was clear to me then that the yellow was a major player.
Addressing that, I used Naples yellow on the untreated and unpainted area to see if that went any way towards replicating the effect of the masking tape. I think it does, so now I need to even up the fabric properly.
I used a very dilute Naples yellow to make the light casts from the tiny lights strung across the shelf, and a mix of less dilute Naples yellow and titanium white for the lights themselves. As what I think are final adjustments to this piece, I’ve added light Naples yellow in small patches to two pots, reflecting the patterns on their surface; and also darkened the lid of the small round pot (left) with dilute Payne’s grey.

If I do this again; and I might, there’s time; I will be much more precise about cutting the fabric and finding a different way to anchor it to a firm surface. A staple gun perhaps. I’ve enjoyed using such a limited palette and also working with just one brush, a 3/4″ flat.
I’m going to post this now but may add to it with a new piece. Staple gun on order!
Time taken: 4 1/4 hours, including preparation and blog.
___
Second iteration on a larger piece of duck cotton. Wet, prepped with transparent gesso, and ironed as I still don’t have a way of pinning down fabric. The first paint layer is a wash of ultramarine blue mixed with titanium white.
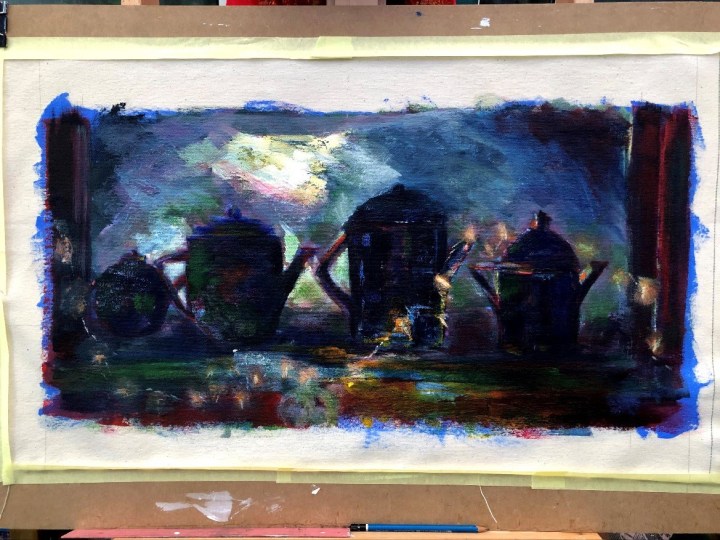
My plan is to reverse the colour palette of the previous version, using more yellow and green this time. I’ve painted in the pots with blue this time instead of red, and the glass in the background with a variable sap green/ultramarine blue/Payne’s grey mix. I roughed out the shelf and struts in cadmium red but moved later to alizarin crimson which made more tonal sense.

At this stage, I’m washing with blue/grey mix to darken some areas and allow others to become more prominent. The back light is cadmium yellow with white applied with a dry brush. The highlights, most of which come from the small lights strung across the shelf and draped over some of the pots, is in the same mix but diluted and later washed with a very dilute mix of crimson and blue. I need to let it settle now so that I can ‘see’ what’s there with a fresh eye tomorrow. Disturbingly, some elements look better on screen than in reality!

Today I’ve been adding up-cast from a yellow light beneath the shelf, the string of lights in a more muted form than before and some hints at pattern on the teapots. Some of this needs muting once that base is properly dry. Meanwhile, one of the mistakes I made at the outset, and without realising it until much later, was the use of an opaque colour for that first blue layer. In the previous iteration, that layer was one colour and transparent which allowed the texture of the support through so that subsequent layers could be ‘scratched’ almost dry on to the surface, letting the bottom layer glow through them. I’ll choose my base layers more carefully in future.

So now let’s mute the pink tones!

This feels better and it’s probably time to stop. The decision now is which one to put forward as the submission. I like the second version because it feels less ‘Disney’ but I think the first represents the teapots better and they’re in closer focus. Either way, I’ve learned a lot from coming at this two slightly different ways. I liked the larger canvas, and in fact the canvas per se – duck cotton seems to be the gateway drug to actual stretched canvas which I’ve largely avoided so far.
Again, one brush throughout – 3/4″ flat. I like the discipline of that.
So now side by side and pinned to foam board instead of taped. It’s a difficult choice and not just due to the change of palette – there’s scale and mood to consider too. I think on balance I am putting forward the larger blue/green version with the red-based piece as a preparatory sketch. It was the first time I had used Duck Cotton and so that in itself was experimental, and ultimately, although I like the red tones I still feel there’s a hint of Disney to it that I can’t quite shake. Ok for some purposes but maybe not for this. I also enjoyed making the second iteration much more and got more angles right than wrong this time. I like the moodiness of it, and in fact, it’s closer to the actuality of the lighting context. Below are some details from each of the pieces.


First the red palette.

Now the green/blue.


So this is my choice for the assignment. Acrylics on duck cotton prepped with transparent gesso. Although I like the red toned version, this feels somehow more mature and painterly even though some of the shapes are not quite right. I was heavily influenced by the ‘mood’ piece required for one of the exercises (see below) but I think it projects a more real quality, and I really enjoyed applying paint to this new (to me) support. Rightly or wrongly, I’m beginning to feel more confident with a brush instead of a piece of pastel or conte, and with larger flat brushes too. I don’t have too much control over the small pointed brushes at the moment so detail doesn’t come easily, but I’ve discovered how to make texture by dabbing or scrubbing wet medium with a piece of damp towel.

Mood sketch.

Due to the ongoing and escalating situation with coronavirus, this submission will be digital, and so I will point up the exercises that formed the bulk of this Part of the module in my next post.
Time taken: including preparation, drying time, and layering, 8 1/4 hours.

I love the first iteration to be honest. The fairy lights add something and the complementart colour combo works so well. It’s got a real atmosphere/mood. 🙂
LikeLiked by 1 person
Thanks, I do too – at the moment! I’d like to see if I can better it though because even though I really like those lights, I can’t dodge the feeling that they raise the twee factor a tad. Tomorrow … 🙂
LikeLiked by 1 person