
The task here is to find a ready-made still life – that is a collection of objects already positioned somewhere in the home that draw the eye – then make a series of sketches to get a feel for the shapes, lines, and volumes they comprise.
I have a shelf on which a number of teapots make their only real contribution to the house – round bellied ones, a juke box shaped one, and a Tardis, with a cafetiere on the end, a velvet bat hanging underneath, and some tiny lights of which only a few actually come on. In order of production, top right is watercolour pencil + Derwent brush pen, bottom right white charcoal, top left green soft pastel, and bottom left bright green conte. The support is white cartridge and black sugar paper inserted into the sketch book. I like to be surprised.

I want to use as many media as possible to pull out these shapes and lines, to access the volumes and see what can be picked out and what left alone or blended. For the eventual still life, I’m torn between a kind of Morandi approach in which there is no line at all, and something more vibrant, but I’ve noticed already a simplification of gestural approach to the image whereby bellies are rounding and the others standing straighter than perhaps they do in reality. I wonder if maybe focusing on a smaller section of this group might be a good thing; reduce the clutter, make shapes not an inventory.
Another day now and I find I’m enlarging and simplifying the elements of this image. For one, I’ve used an A4 sketchbook and for the other a piece of torn cardboard pre-prepped with first white then black gesso. My idea had been to scrub or scratch the surface to expose the white under layer but this hasn’t worked. Cardboard is very absorbent and so the black is unscathed.
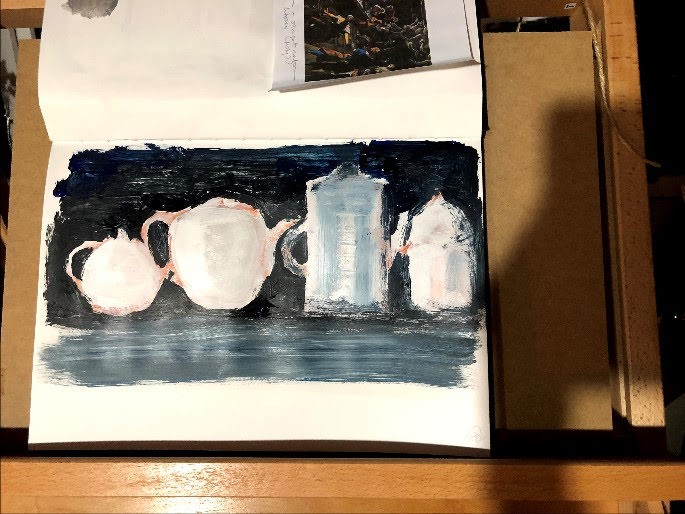
The sketchbook is un-prepped white cartridge on which I used a very dilute burnt sienna applied with a half inch brush (I need to get to grips with the proper identifiers of these things although most of mine are so old, much of their original shape is lost), and then when dry, a layer of white paint within the shapes – including the negative space. Later I added a blue/black mix for the basis of the shelf and background. I’ve sealed this with matte medium and my next step when this is dry will be a complementary colour wash just to see how that works.
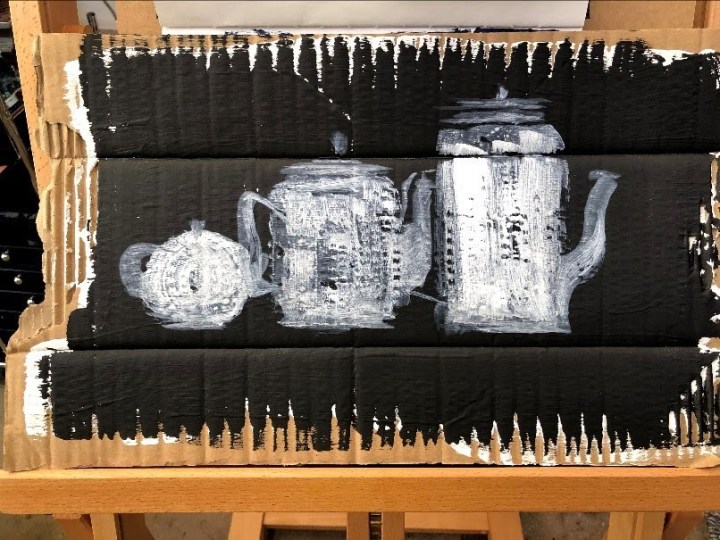
So far, the cardboard support version, bigger and also simpler than the others, is just dilute white acrylic applied with a 3/4″ brush. I like the way this has skated over the troughs of the cardboard and how the shapes have emerged from repeated gestural learning over this short sketching period. I may leave this one as it is, keeping it as an option for a later piece because there’s something about the ghosting that happens when you abandon detail for form and let the underlying support make its own contribution.
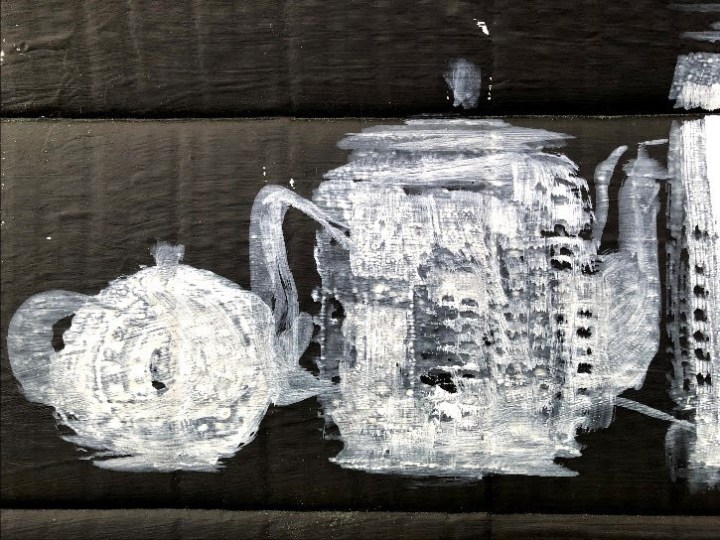
18th February and another couple of layers. I added a burnt sienna wash last night which gave the thicker paint in the background an orange sheen that I didn’t like. Then I found some metallic acrylics and, since the shelf is varnished with a metallic sheen, the background is actually a frosted window through to the other room, and one of these teapots is a Tardis, seemed totally appropriate. The light being cast onto the shelf and the pots made them all seem golden when in fact they are various different colours, and the ones on the right are in shade.

The shapes are slightly out of wack and I’m not too pleased with the shelf or the wall underneath it which seem to merge into one, but I think I learned a lot through this exercise about the use of layers and colours, and the kinds of brushes I can draw with. The frosted glass, which is actually patterned, probably pleases me most, along with the silvered area to the right. I had Morandi in mind and his use of tone rather than line while I was making this sketch and used my finger in places to blend. I also experimented with single stroke blocks of colour (the two pots on the right) to bring up the shapes within the shapes. There is a line of negative space on the edge of the last pot which seems to indicate light from a different source, and it does and I wish I had left that intentionally. Next time!

One thought on “Part 2, project 2, ex 1 still life sketches”